There’s a jar on my studio shelf that drives tidy people mad. It’s full of bottle caps — red ones, silver ones, the good wide ones from the milk jugs. My sister started it as a joke, dropping caps off “for your collection” whenever she visited. Then her kids arrived at my table one rainy Saturday, bored stiff, and that jar turned into an entire afternoon of making things.
That’s the lesson I keep coming back to: caps are free, they’re the same size (roughly), and small hands can actually grip them. Wash them well, dry them properly, and you’ve got bugs, games, instruments, and gifts for the price of some paint and glue. Here are the ten projects we’ve made from that jar — the honest version, including what went wrong first time.
1. Painted ladybugs that earn their keep as counters
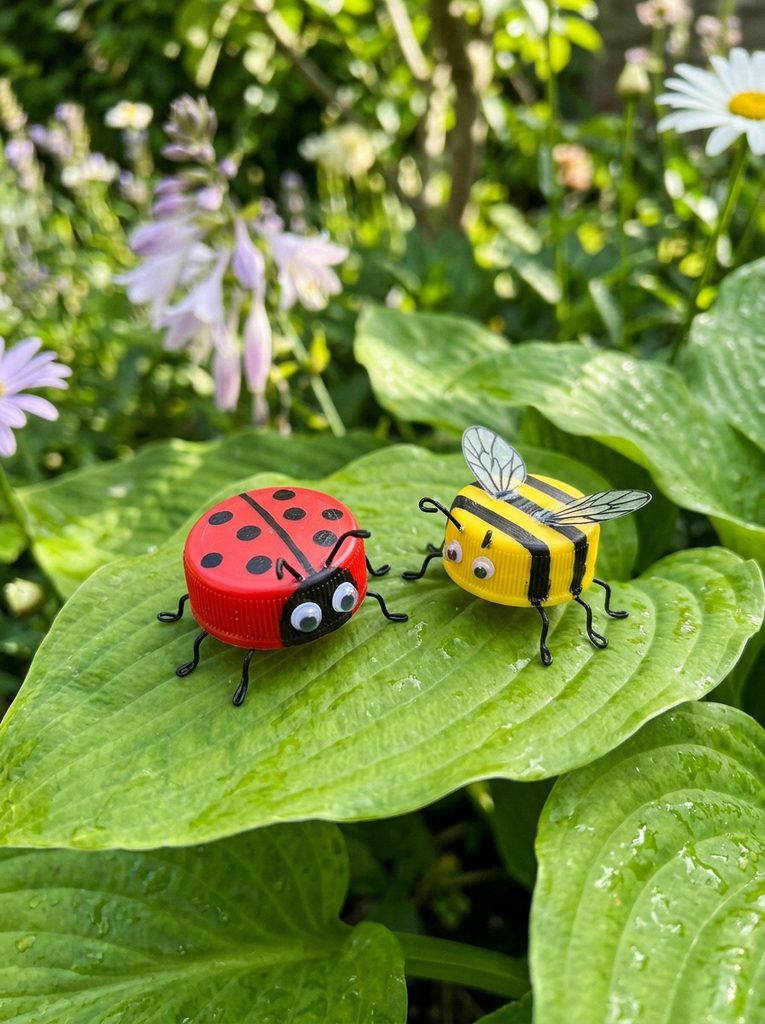
Our first batch — the green beetle was the surprise favourite.
Start here, honestly. Pick smooth plastic caps, all about the same size, and wipe them with rubbing alcohol — skip that and paint won’t grip. Two thin coats of acrylic beat one thick gloopy one; let each dry fifteen minutes or the colours bleed. The domed top of the cap is already a bug shell. Cheating, in the best way.
For spots, dip the wooden end of a paintbrush in black paint and stamp. Perfectly round dots, no skill required — the kids were better at it than me. Add a black semicircle for the head, stick on wiggle eyes, bend short pipe-cleaner pieces into V shapes for legs.
Best part: seal them with clear varnish and they stop being decorations and start being tools. We count with them, sort them, do tiny sums on the table. Ours have survived two years of that. Cost: basically nothing. Time: an hour, mostly drying.
2. A little wind chime that actually sounds sweet
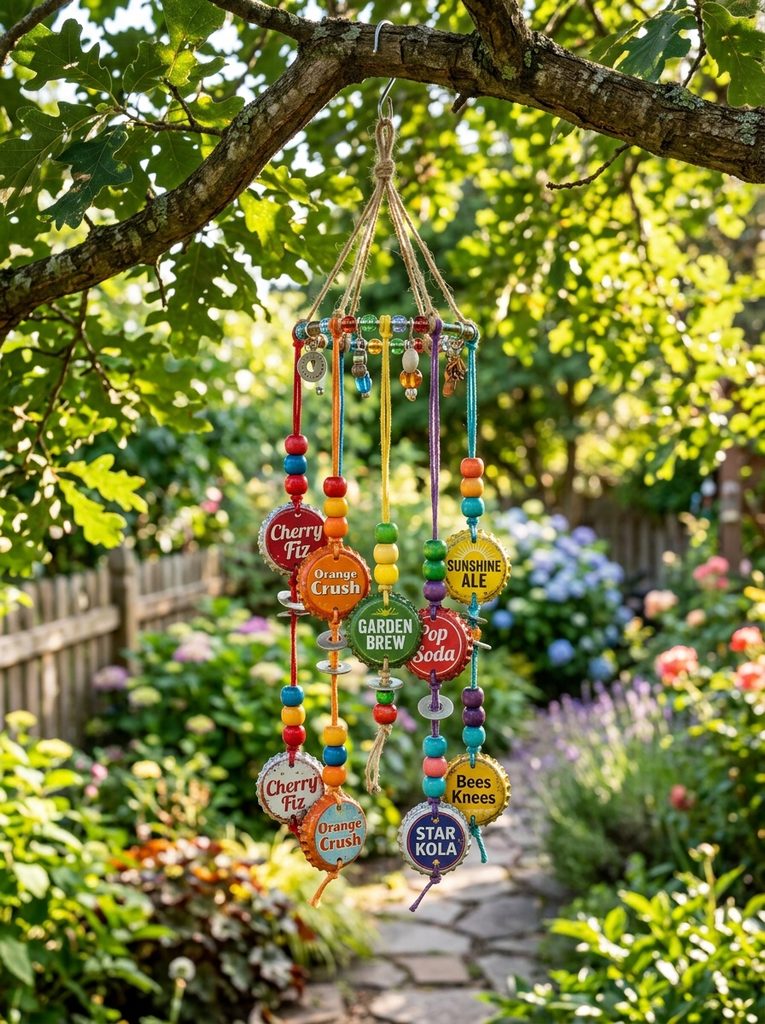
Strung on a birch twig from the garden. It tinkles more than it chimes.
Metal crown caps make a genuinely pretty sound — light, bright, not annoying. You’ll want about twenty, and this is the one project where I insist an adult does the sharp bits. Check every cap for jagged edges; sand them smooth or throw the cap out. Then punch a hole through the centre of each: hammer and nail, cap on a scrap of wood.
Cut four lengths of twine, roughly 45 centimetres. Knot a big wooden bead at the bottom of each as an anchor, then thread five caps per string with a pony bead between them. That spacing matters. My first version had the caps touching, and they clattered dully instead of ringing. Beads between them gave each cap room to sing.
Tie the strands along a small branch or old plastic lid, add a loop, hang it where a breeze passes. Ours lives by the studio window. On windy days it earns its place.
3. Alphabet caps — spelling practice that doesn’t feel like homework
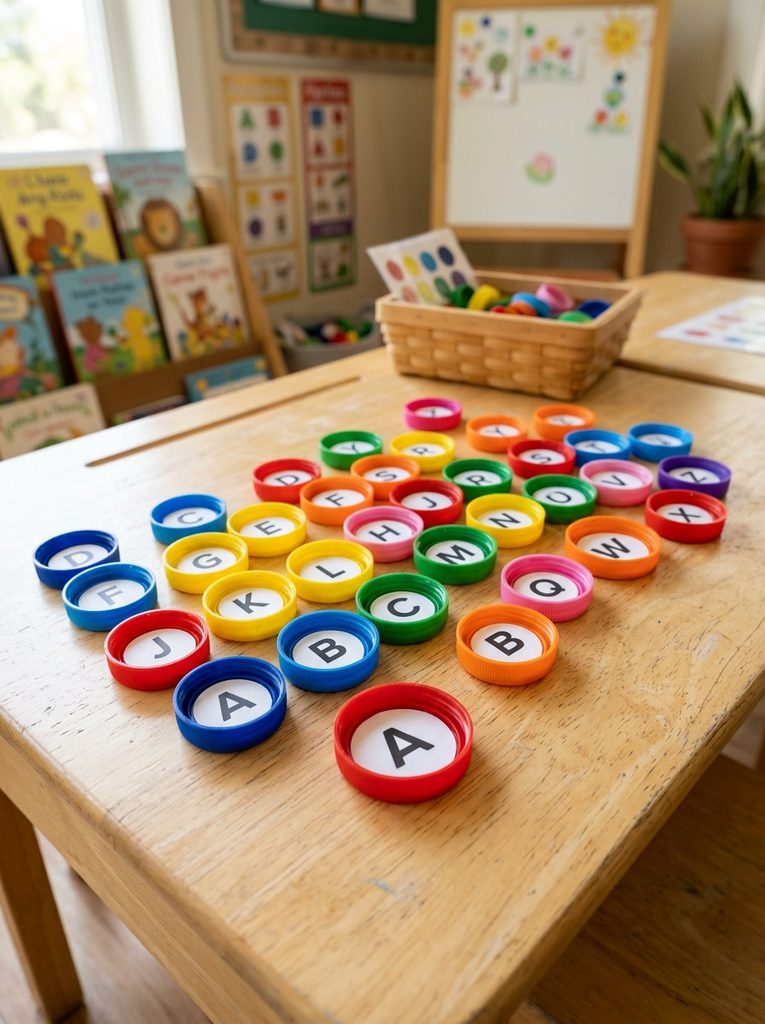
Fifty-two caps — the kids did most of the cutting, thankfully.
This is the project that takes the longest and gets used the most. You need 52 plastic caps of similar size — a full alphabet, uppercase and lowercase. Trace a cap onto white cardstock, cut out 52 little circles (safety scissors, small hands, patience), and write the letters on: capitals in black marker, lowercase in bright colours.
A pea-sized dab of glue in the well of each cap, press the disc in flat, and leave the set alone for a couple of hours. I rushed this once and the discs curled up like tiny umbrellas. Don’t rush it.
What you end up with is a chunky alphabet kids can push around a table to build names, match pairs, and spell rude words and giggle. They stack, store in one tub, and survive being dropped, which worksheets do not. If 52 feels like a mountain, start with your child’s name and add the rest on another rainy day — we did.
4. A mosaic frame that hides a boring shop-bought border
Start at the corners while your patience is fresh. Trust me.
Take one plain wooden frame (the flatter, the easier) and remove the glass and backing before anyone touches glue.
Then do the step every kid wants to skip: lay the caps out dry and arrange the whole pattern first. Big caps, small caps, colours mixed across sizes. Photograph the layout with your phone. You will knock it at least once. We knocked it twice.
Work from the corners inward, a dab of tacky glue under each rim, press and hold ten seconds. Large caps first, then small ones wedged into the gaps, slightly overlapping — that’s where the lovely chunky texture comes from. Thin school glue will not hold these, by the way. It peels within a week. Tacky glue or foam tape, or don’t bother.
Leave it flat three hours before the photo goes back in. Ours holds a very serious portrait of a six-year-old in a cardboard crown, and the frame still gets more comments than the photo. Fair enough, really.
5. Lily pads that float (with a little glowing frog pond)
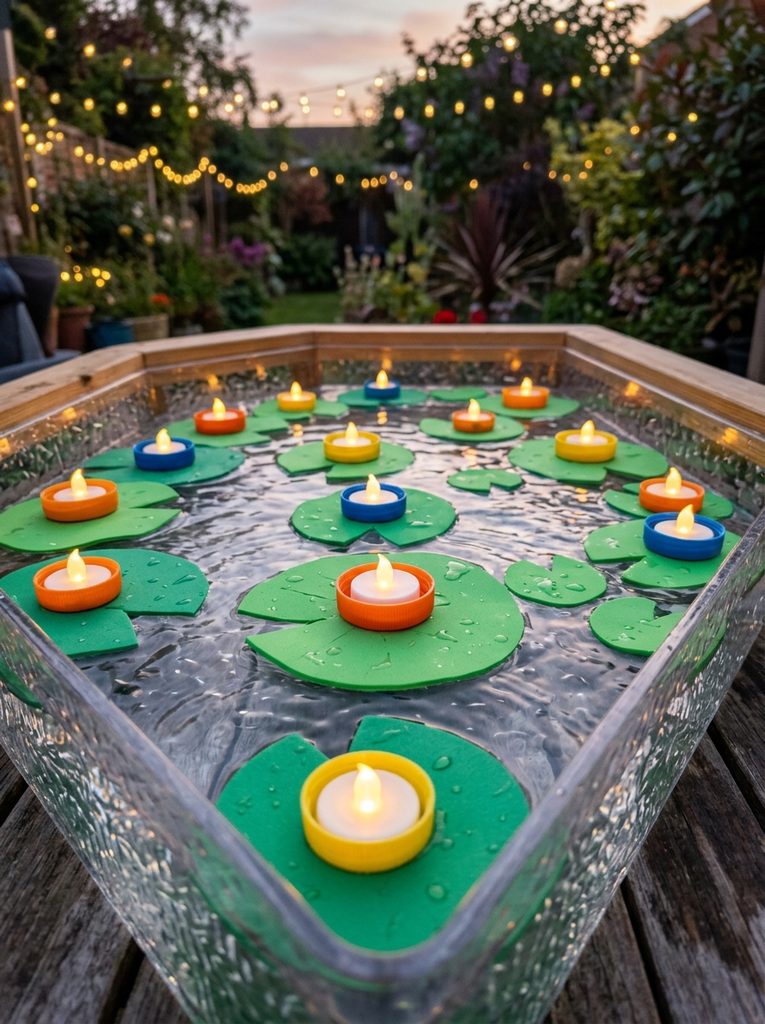
Evening water play — the tealights make it a tiny festival.
Cut circles about ten centimetres wide from green craft foam — it has to be foam, paper dies within a minute — and snip a small triangle from the edge so it reads as a lily pad, not a coaster. Then take your widest caps, the big ones from milk or juice jugs, turn them cup-side up, and fix them in the centre of each pad with waterproof glue.
Into each cup goes either a battery-powered waterproof tealight (never a real flame near kids and water, obviously) or a small toy frog. Frogs for the kids, tealights for the adults.
One honest note: balance is everything. A cap glued even slightly off-centre makes the pad tip and take on water like a sinking ship, which happened to two of ours at the first launch. Funny, but soggy. Centre them carefully, test one before making ten, and float them in a shallow bowl or the birdbath on a calm evening. A small, quiet kind of magic.
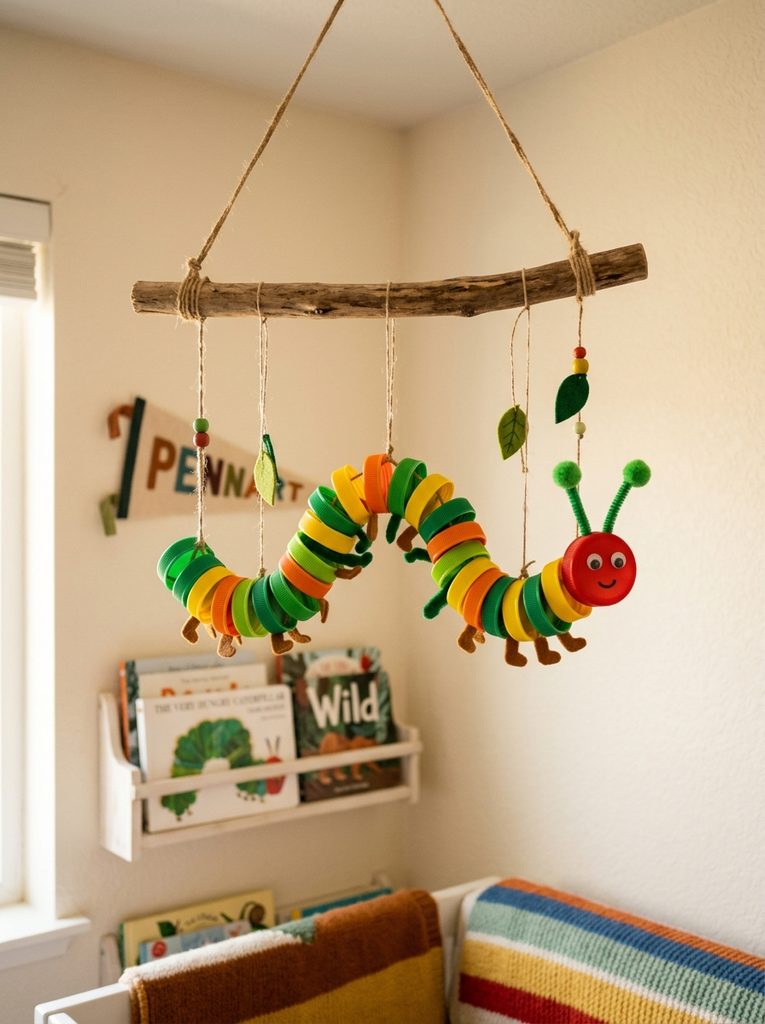
6. The caterpillar that lives on the wall now
He lives above the reading corner. His name is Bruno. I don’t make the rules.
Eight to ten caps in greens and yellows, plus one red cap for the head. An adult punches two holes in opposite sides of each cap — a sturdy hole punch or an awl does it — then thread a length of flexible craft wire or a long pipe cleaner through, cap after cap, until you have a wiggly chain.
Don’t pull the wire tight. Leave a little slack between the caps, because that looseness lets the caterpillar curve and droop like a real one instead of a stiff green ruler. I made the first one too tight; it looked like a caterpillar that had swallowed a broom handle. Second try: better.
Glue wiggle eyes and a pom-pom nose onto the red cap, bend two pipe-cleaner antennae, and tie the whole thing under a small twig with twine so it hangs like a mobile. Ours went up over the reading nook after a certain hungry-caterpillar book had been read four hundred times.
7. Fridge magnets with tiny drawings inside
Grandmother got four. Still on her fridge — the highest honour going.
These are my favourite gift project, full stop. Use metal crown caps or deep plastic ones. Wipe the inside clean, then cut little circles of paper or photo — a one-inch circle punch is worth owning if you make these often — and let the kids draw something tiny: a face, a cat, a very ambitious dragon.
Glue the picture into the cap with clear decoupage glue, smooth the bubbles out with a fingertip, then brush another coat over the top. It goes on milky and dries clear and glossy, like resin without the faff or the fumes. Two hours of drying. Then glue a strong button magnet to the back. Self-adhesive ones are fine for paper-light caps; for metal caps I’d use proper craft glue, because a magnet that slides off and drops the artwork behind the fridge helps nobody.
We’ve made these for teachers, grandparents, and one very patient postman. Twenty minutes each, they cost cents, and a child’s drawing sealed under that shine looks like a tiny museum piece.
8. Castanets from two caps and a strip of cardboard
Loud. Joyfully, unforgivably loud. Make them anyway.
Cut a strip of thick cardboard about 20 by 5 centimetres — corrugated works best, it’s springy — and fold it in half. That fold is the whole instrument: it snaps open on its own, like a crocodile’s mouth in a good mood. Let the kids decorate the outside first, because once the caps are glued on, small hands will not want to wait.
Glue two clean, unbent metal caps to the inside tips of the strip, hollow sides facing each other, about a centimetre from the ends. High-tack glue or foam tape; this joint takes a beating. Then — hardest step — leave it alone for a couple of hours. Ours got tested after twenty minutes, obviously, and one cap flew off into a cup of tea.
When the caps finally meet, the click is bright and proper — a tiny flamenco dancer. Tap fingers together, find a rhythm, accompany every song on the radio. Wonderful for music play. Less wonderful at seven in the morning. You have been warned by a man who knows.
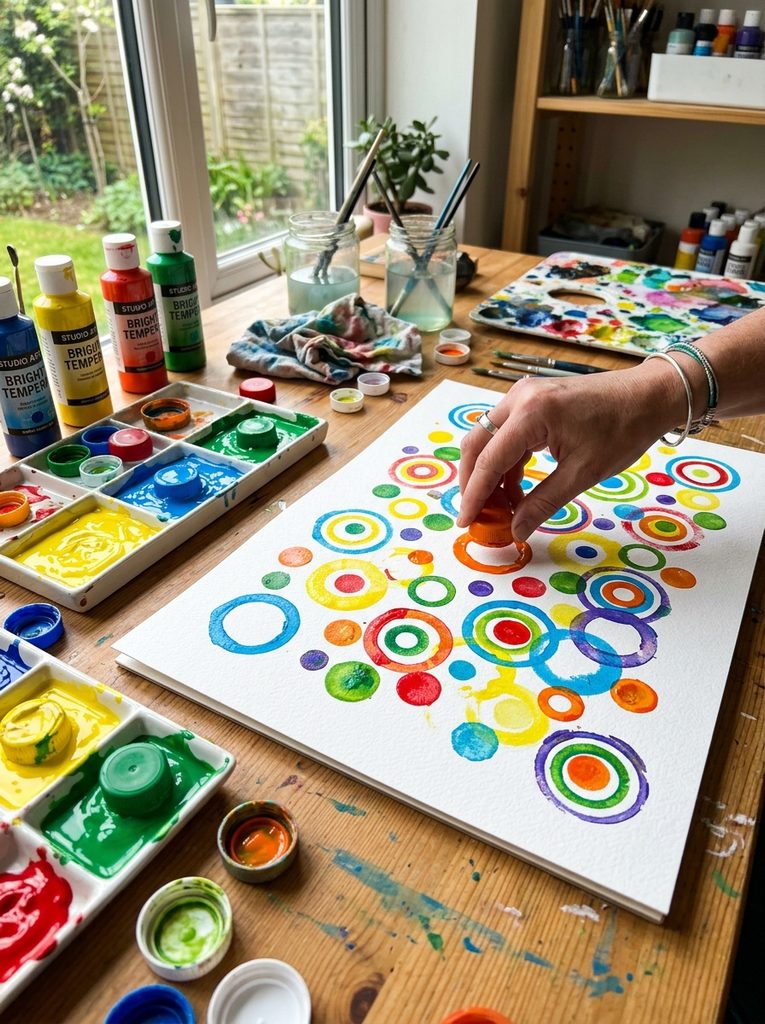
9. Stamping pictures with caps (the gloriously messy one)
No brushes, no rules, circles everywhere. The table survived. Just.
Save this one for a day when mess is acceptable, because here the process is the entire point. Gather caps of every size you have — water bottle lids, big jar covers, the ridged sports caps. Each stamps a different mark: the flat top gives a solid dot, the open rim gives a ring.
The trick that makes it work for little hands: glue a wooden bead or an empty thread spool inside each cap as a handle. A plain cap is slippery with paint; one with a handle is a printing block a three-year-old can grip.
Pour washable tempera into shallow plates — shallow matters, you want a film of paint, not a swimming pool — and press, lift, press, lift. Overlap the rings. Build flowers out of dots, bubbles out of rings, a whole page of cheerful chaos. Thick paper holds up best. Our best sheet became wrapping paper for a birthday present, and I stand by that decision. Aprons on, sleeves up, embrace it.
10. Tic-tac-toe that lives in a pouch and travels anywhere
The board is the bag — ten caps inside, straight into the car.
Ten caps, all the same size: five in one colour, five in another. Blue and orange in our house. Paint or draw a bold X on the first five and a big O on the rest — a paint pen is easiest and doesn’t smudge once dry.
Now the clever part. Take a plain drawstring pouch, slide cardboard inside it so the ink can’t bleed through, and draw the nine-square grid straight onto the fabric with a fabric marker and ruler. The board is the bag. The pieces live inside the board. Nothing to lose down the side of a car seat — well, less to lose. We still lost one O to a restaurant last summer.
Half an hour to make, weighs nothing, and it has settled more back-seat disputes than I can count. If your caps are different sizes, that works too — just keep the two teams consistent, so nobody argues the big X counts double. Somebody will try. Probably an adult.
What I’d start with, and what I’d skip
If your cap jar is small, begin with the ladybugs and the magnets. Both are forgiving, both dry fast, and both give you something finished within the hour — which, with small children, is the whole game. The alphabet set is a two-session project; don’t start it at 4 p.m. on a Sunday and expect peace.
On a budget, everything here is free except three things worth buying: good tacky glue (cheap school glue will betray you on plastic, every time), one set of acrylic paints in primary colours, and a bag of wiggle eyes. Skip the wind chime if your caps are mostly plastic — it needs metal — and skip the lily pads without foam sheets. Everything else, the jar provides.
Questions I get asked
How do I clean the caps properly?
Warm water, dish soap, a soak, and a scrub with an old toothbrush for the sticky rims. Dry fully on a towel — paint on a damp cap is paint that peels — and wipe plastic caps with rubbing alcohol before painting.
Are metal caps safe for small children?
For toddlers, stick to smooth plastic caps and supervise anyway — caps are a choking size for the very small. Metal caps are for older kids: check every edge, discard anything bent, and an adult does all the hole-punching.
Why does the paint keep flaking off?
Usually one of three things: the cap was greasy, the paint went on in one thick coat instead of two thin ones, or nobody sealed it. A drop of dish soap in the acrylic helps it grip, and clear varnish at the end keeps it on through actual play.
Which glue actually works on bottle caps?
Thick tacky craft glue is my default; foam mounting tape is brilliant for magnets and castanets. Thin white school glue is lovely on paper and nearly useless on smooth plastic — this from a man who has re-glued the same ladybug legs four times.
How long do these projects really take?
Most are 20 to 45 minutes of making, plus drying time you shouldn’t shortcut. The alphabet set is the long one. Make in the morning, play after lunch, let the glue have its hours in between.
That’s the jar. If you try any of these, start with the bugs — and save this to your craft board for the next rainy Saturday. The caps are already in your kitchen. — Elias