A teen’s bedroom does more jobs than any other room in the house. It’s where she sleeps, studies, gets ready, calls friends, and hides from the rest of…
A teen’s bedroom does more jobs than any other room in the house. It’s where she sleeps, studies, gets ready, calls friends, and hides from the rest of us when the day has been too much. Most rooms I see try to do all of that with one bed, one desk, and a chair that’s slowly disappearing under clothes. No wonder it never quite works.
I’ve helped redo a few of these rooms now, and the lesson is always the same: don’t buy a theme, build zones. A corner for sleeping, a corner for work, a corner for doing absolutely nothing. The ten ideas below are the ones I’d actually use — some cost a weekend and a tin of paint, a couple cost real money, and I’ll tell you honestly which is which.
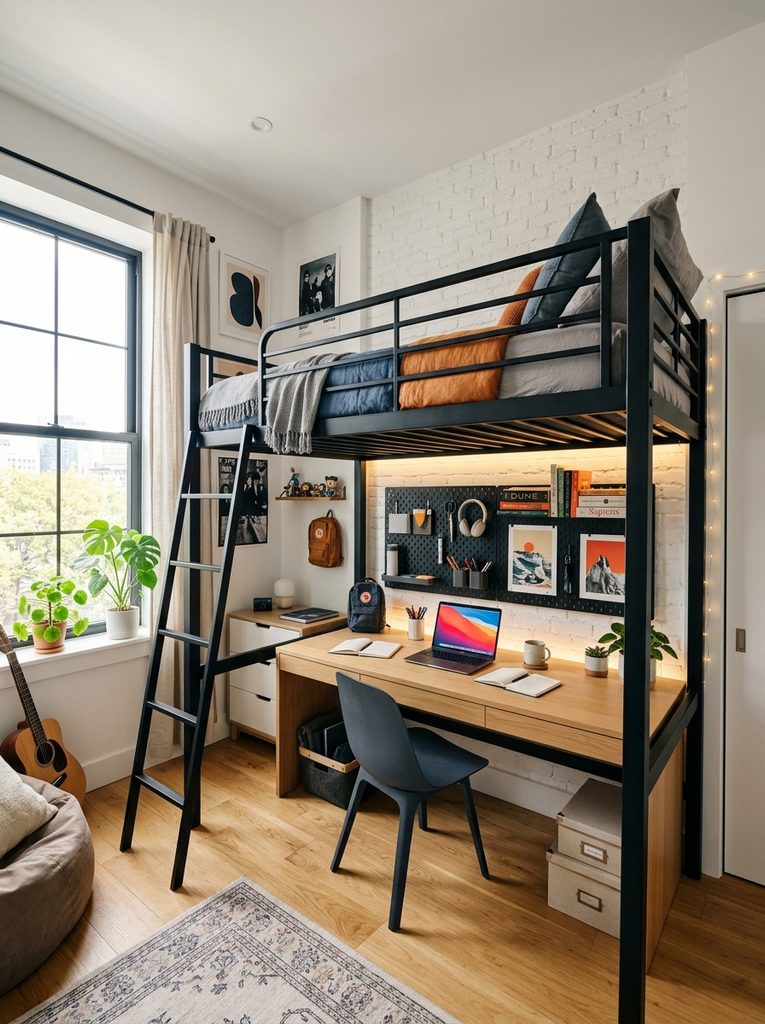
1. Sleep up top, homework underneath
The desk-under-bed trick is the single best use of a small room I’ve found.
A loft bed is the oldest space trick there is, and still the best one for a small room. The mattress goes up five or six feet, and the floor space underneath becomes a proper study nook — full-length desk, a pegboard or magnetic strip for notes and headphones, a decent chair, and a lamp clipped to the frame. Keeping sleep and study in separate zones matters more than people think; homework done in bed tends to turn into a nap. Two honest warnings from experience. First, anchor the frame into wall studs, not just drywall — this is non-negotiable with a teenager climbing it half-asleep. Second, measure the ceiling height before you buy. Anything under about 2.4 metres leaves the top bunk feeling like a cave, and she’ll stop wanting to sleep up there within a month.
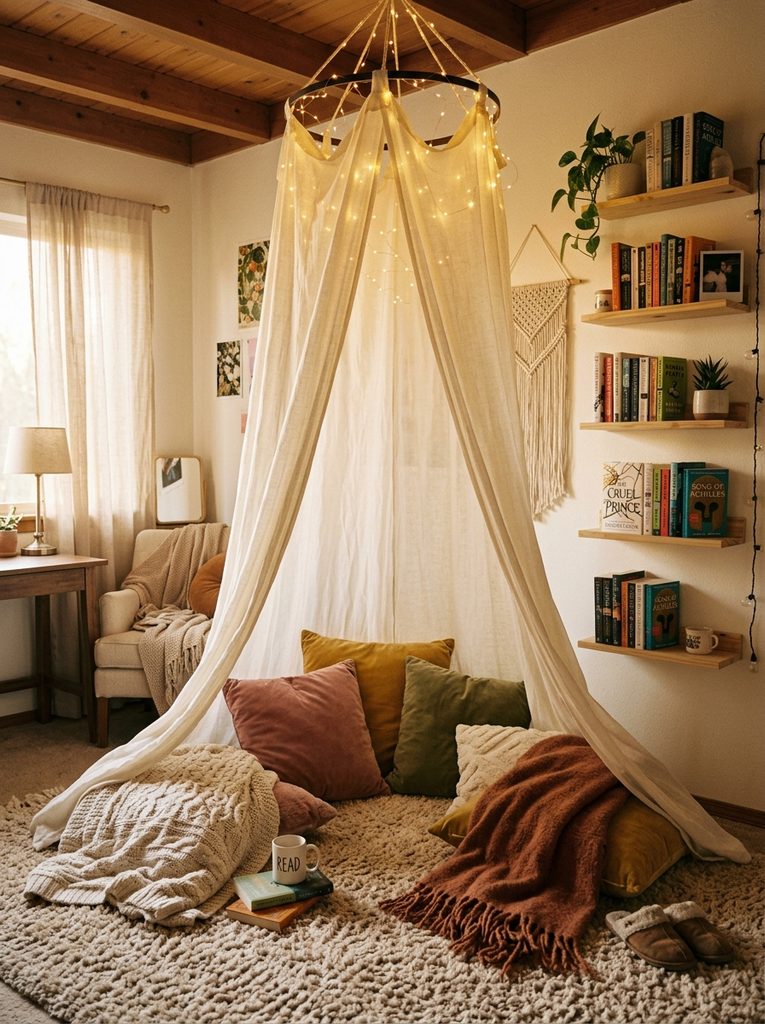
2. A canopy corner for doing nothing
Cheap fabric, big effect — this corner gets used more than the desk, if I’m honest.
Every teen room needs one spot that has no purpose beyond being comfortable. A ceiling canopy over a pile of floor cushions does it for very little money: a hoop canopy in sheer linen or cotton, a thick rug underneath, two or three big cushions, and a blanket she already owns. The canopy is the whole trick — it makes a corner of an ordinary room feel like a separate place, somewhere to read, listen to music, or just decompress away from a screen. Screw the hook into a ceiling joist, not bare plasterboard; I learned that one the exciting way, with the whole thing landing on me mid-installation. Add a small floating book ledge on the wall beside it and a strand of battery fairy lights through the hoop, and you’re done in under an hour. Total cost can stay under fifty if you shop patiently.
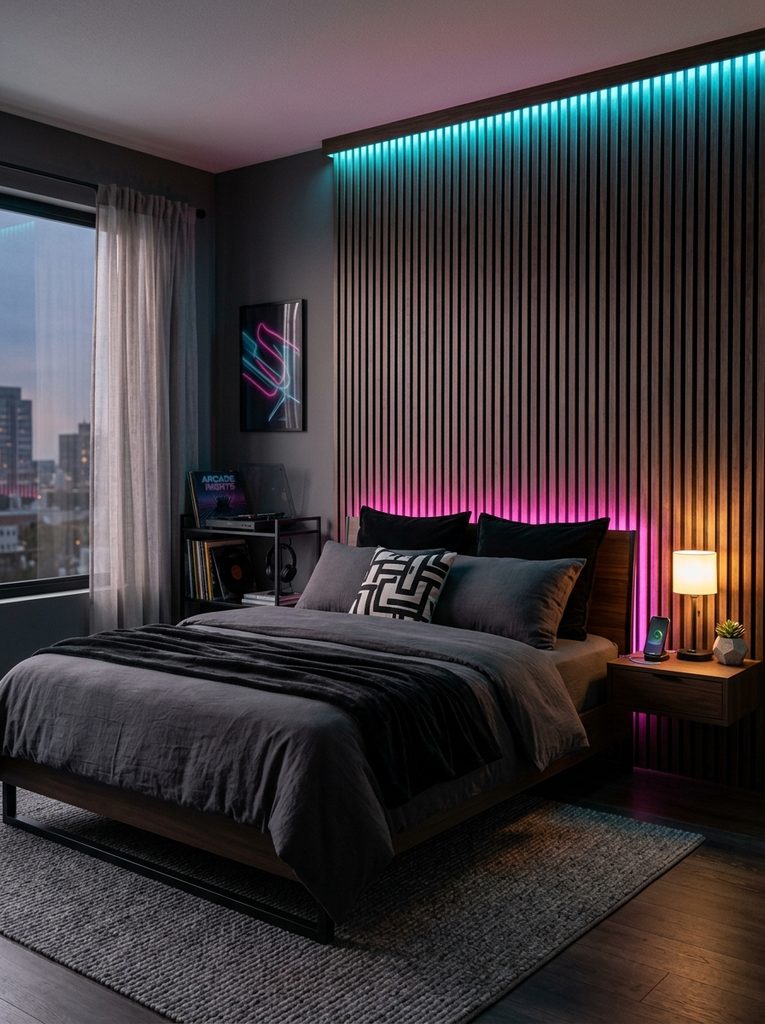
3. The slatted wall with light behind it
Warm white behind the slats looks expensive. The rainbow gaming colours, less so.
Acoustic slat panels — thin wood-veneer strips on a black felt backing — have moved from offices into bedrooms, and behind a bed they look genuinely good. The felt soaks up a bit of echo, the wood adds warmth, and a strip of LED neon rope tucked along the edge gives the whole wall a soft glow at night. Warm white looks calm and grown-up; the colour-changing modes get used for exactly one week, in my experience, then stay on warm white forever. Fitting is straightforward: measure, cut panels with a fine-tooth saw, glue and screw through the felt into studs. My practical tip: do the cable route first. Decide where the power supply hides before the panels go up, or you’ll end up with a beautiful wall and an ugly white transformer dangling beside the bed, which rather ruins the effect.
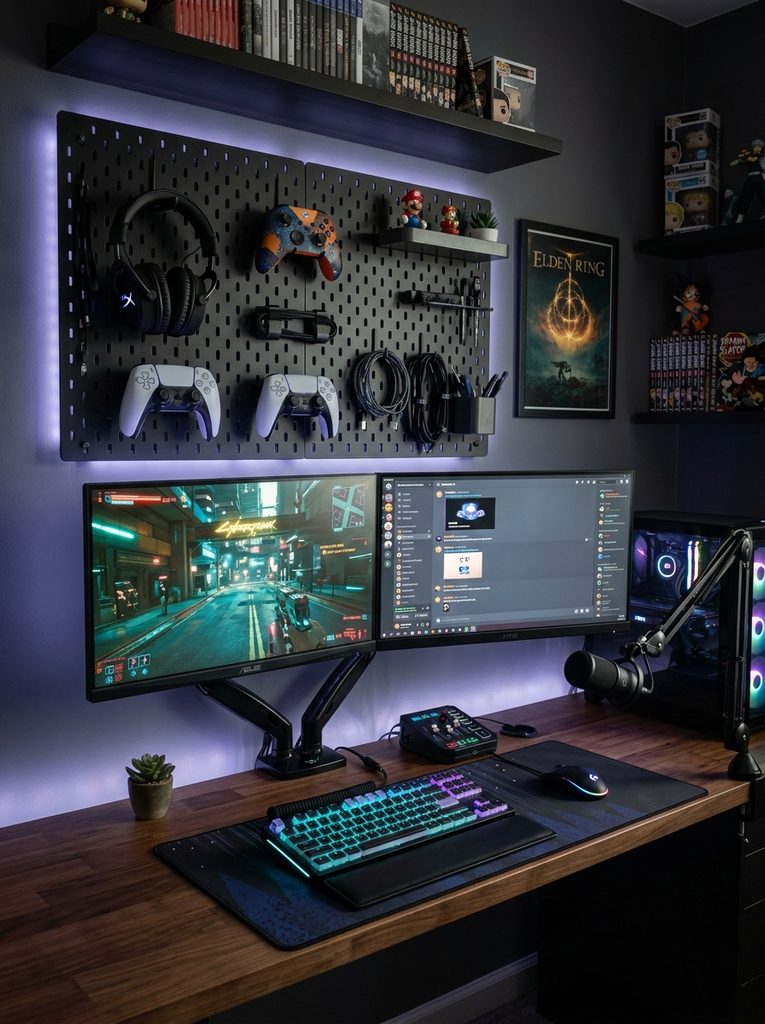
4. Pegboard headquarters for the gaming gear
Controllers on hooks, cables in a basket — the desk finally stays clear.
If there’s gaming gear in the room, it will colonise the desk unless you give it a home on the wall. A steel or wooden pegboard above the desk holds controllers on double hooks, headphones on a wide bracket, and cables in a shallow basket — everything visible, nothing tangled, and the desk surface stays free for actual homework. Leave a small gap behind the board so hooks can slot in, and use rubber-coated hooks so controllers don’t get scratched. Under the desk, screw a wire basket tray to the back edge and park the power strip and spare cable length in it. That one hidden tray does more for how tidy the room feels than any amount of storage boxes. Word of caution: pegboards invite collecting. Agree a rule early — if it doesn’t fit on the board, it doesn’t live on the desk.
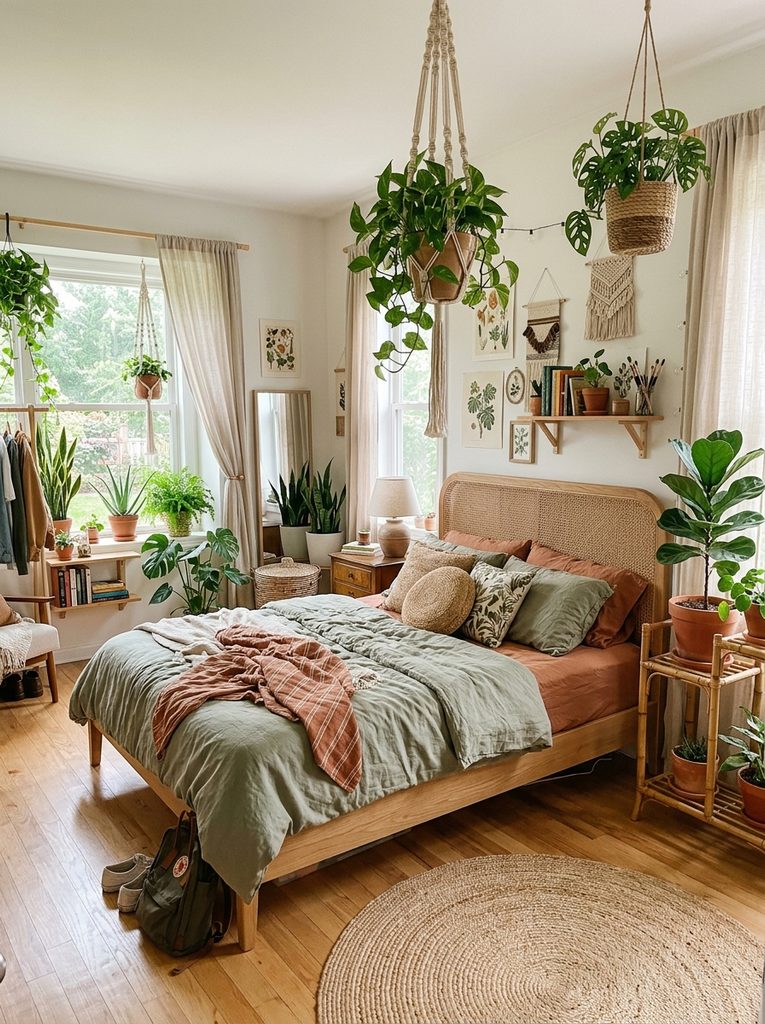
5. Plants, rattan, and a slower pace
The pothos by the window is three years old now and has survived two holidays. Respect.
The boho version of a teen room swaps plastic and neon for rattan, linen, jute, and plants — and it’s the style that ages best, because nothing in it is tied to a trend she’ll be embarrassed by at seventeen. A woven rattan headboard, an ivory linen duvet, a mustard or clay-coloured throw, and a round jute rug get you most of the way there. Plants do the rest. Start with the unkillable ones: pothos trailing from a high shelf, a snake plant in a terracotta pot, a ZZ plant for the dark corner. I’d skip the monstera in a small room — it becomes the room’s main character within a year. One real tip: group plants together near the window instead of scattering single pots around. They’re easier to water, they look like a deliberate collection, and fewer of them quietly die behind the wardrobe.
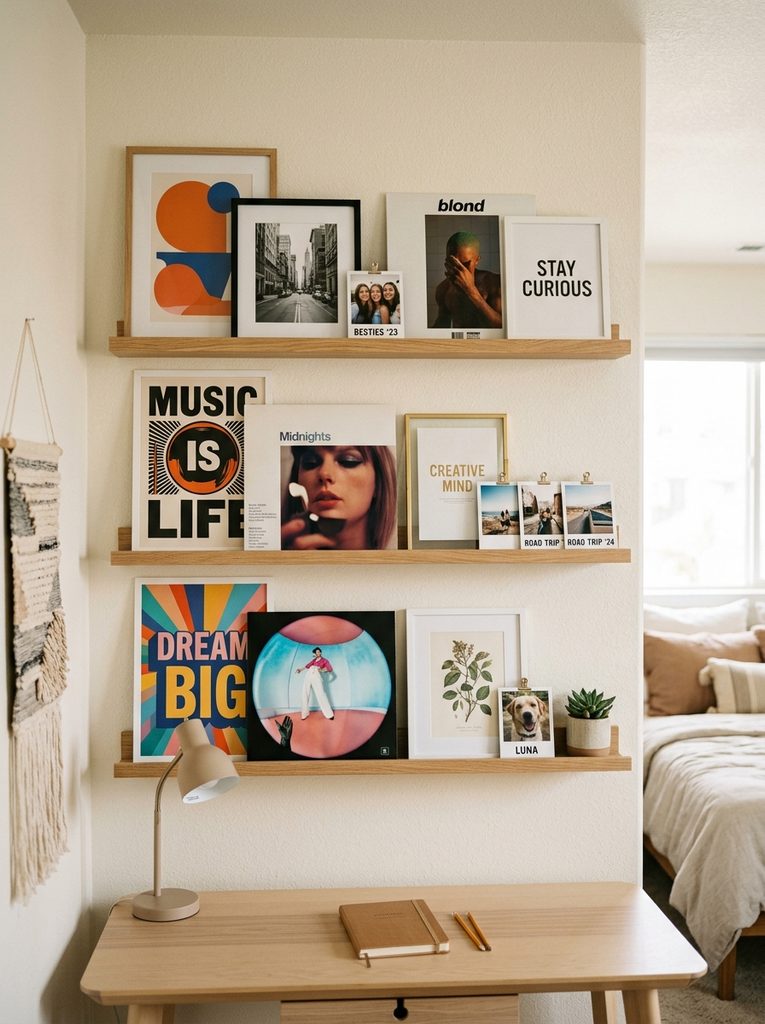
6. Picture ledges instead of a fixed gallery wall
Ledges, not nails — next month’s favourite band doesn’t need new holes in the wall.
A teenager’s taste changes roughly every school term, so nailing a fixed arrangement of frames to the wall is a promise you’ll be filling holes by spring. Picture ledges solve it. Fit two or three slim ledges — level them properly and screw into studs, because a ledge full of frames is heavier than it looks — then lean the art instead of hanging it. Big frames at the back, smaller ones overlapping in front, a concert ticket or polaroid clipped wherever there’s a gap. When her interests shift, the whole display changes in five minutes with zero damage. I like matching thin frames in black, white, or oak for the backbone of it; the contents can be as chaotic as she wants and it still reads as intentional. Leave one small space permanently empty, too. A ledge that’s completely full starts looking like clutter; a gap makes it look curated.
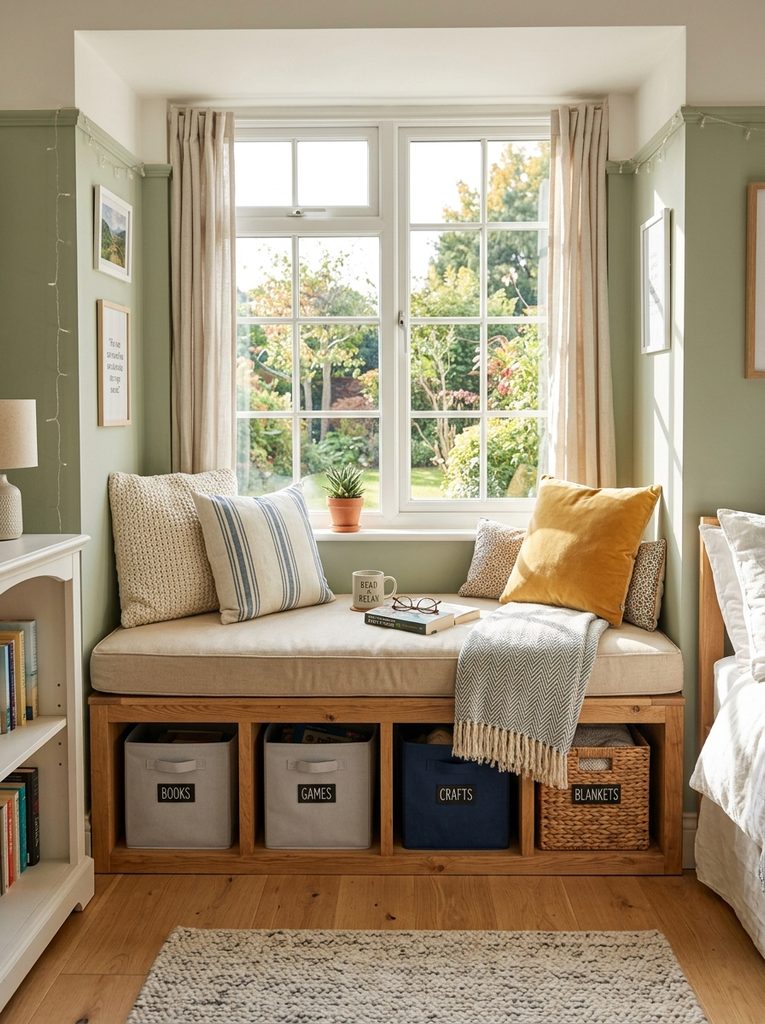
7. A window bench that swallows the mess
Best seat in the house at 4pm when the light comes in. The bins hide everything else.
The stretch of floor under a bedroom window is usually wasted, and a low bench fixes it twice over — a seat in the best light in the room, plus storage underneath. The simple build: a sturdy two-by-four cube unit laid horizontally under the sill, screwed to the studs, topped with a foam pad about three inches thick in a zip-off canvas cover. Fabric bins slide into the cubbies and swallow shoes, spare bedding, sports kit, and the general debris that otherwise migrates around the floor. Cut the foam with an electric carving knife if you have one; a bread knife works but you’ll fight it. This is a half-day build, not an hour, and getting the cushion cover tailored-looking took me two tries — buy the cover slightly large rather than slightly small. Friends visiting will fight over this seat. They always do.
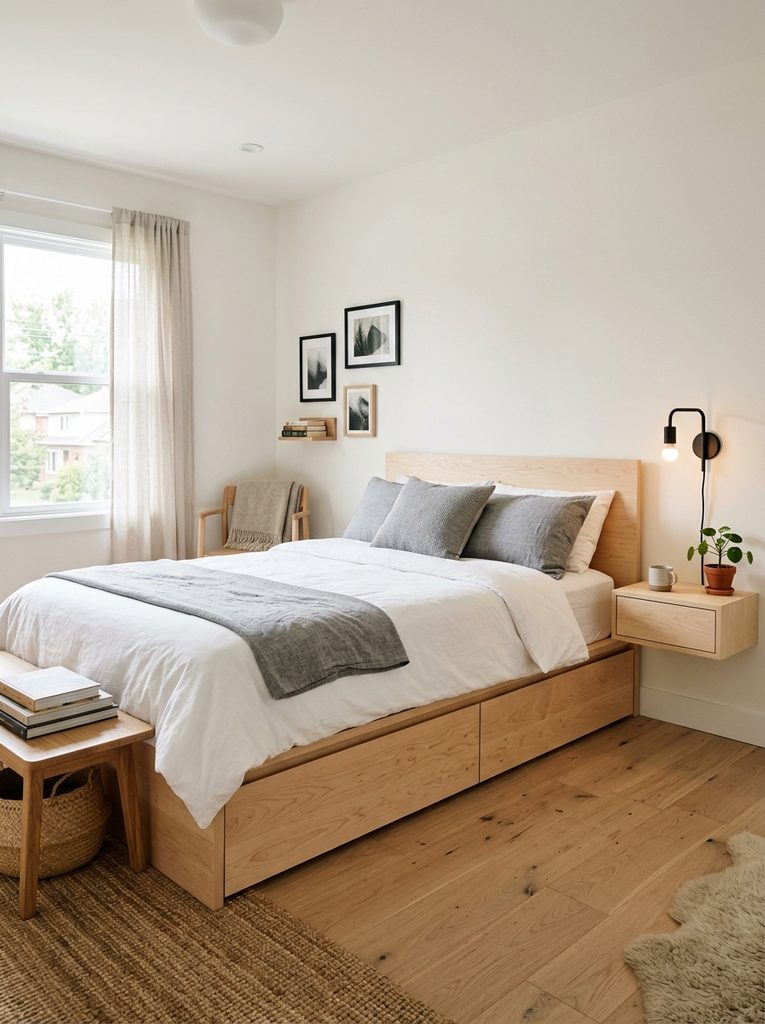
8. The low Scandinavian bed with drawers hiding in it
Light wood, low profile, drawers underneath — the calmest-looking option on this list.
This is the bed I’d choose for a calm, grown-up feeling room — which will surprise nobody who reads this blog. A low platform frame in birch or pale oak, no box spring, mattress straight on the slats, and deep drawers built into the base that glide out on rollers. Those drawers are the point: bulky jumpers, spare linens, and out-of-season clothes disappear, and the room keeps the empty, restful look that makes Scandinavian bedrooms work. Keep bedding simple — white or pale grey cotton, one knitted throw across the foot — and put floating nightstands beside it so the floor stays visible. One buying tip: check the drawer slides in the shop if you can, and push them hard. Cheap rollers rattle and sag within a year, and a drawer that scrapes is a drawer that stops being opened, which means the storage might as well not exist.
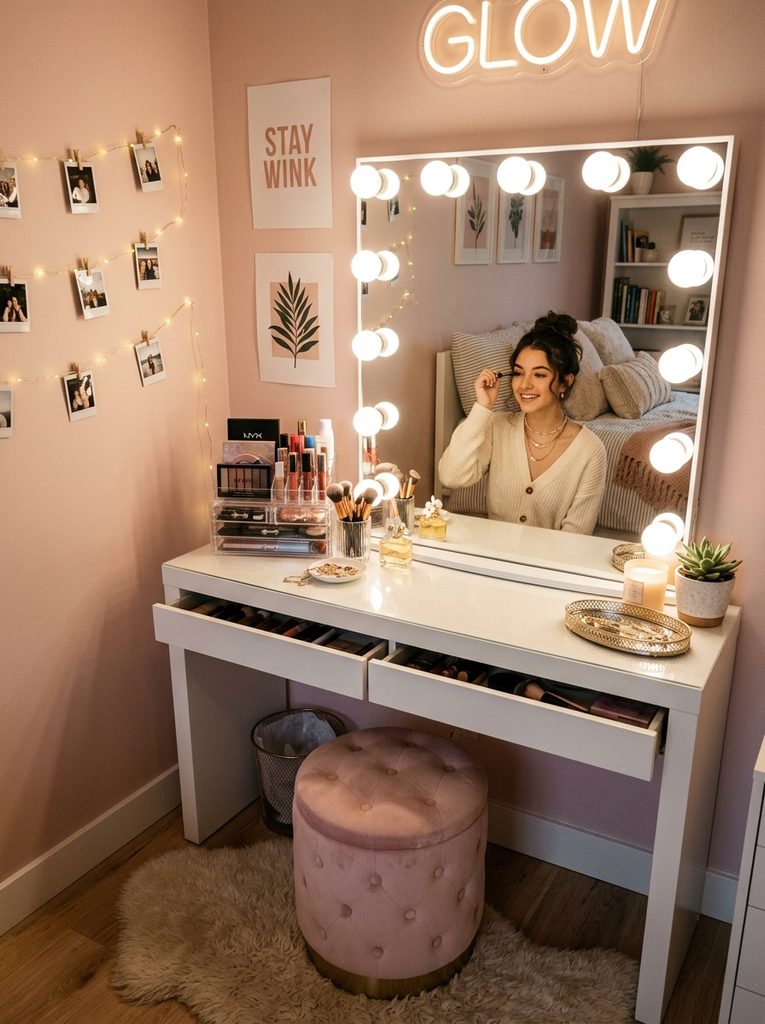
9. A proper vanity corner, mirror lights and all
Bathroom counter, freed. Everything for getting ready lives in one small corner now.
A dedicated vanity corner does one unglamorous, wonderful thing: it moves skincare, hair tools, and makeup out of the shared bathroom and into her own room. The setup is a slim console table with a drawer or two, a big mirror with dimmable bulbs around it, and clear acrylic trays inside the drawers so everything is visible at a glance. Daylight-balanced bulbs matter more than the mirror itself — warm bathroom-style light lies about makeup, and she’ll discover that in the school corridor mirror instead. Anchor the table to the wall with an anti-tip bracket, especially if it’s a narrow one; I don’t skip this, ever. A velvet stool that tucks fully underneath keeps the floor clear, and a small power strip fixed under the tabletop handles straighteners without a cable waterfall. Keep a tiny bin beside it. Cotton pads multiply like nothing else on earth.
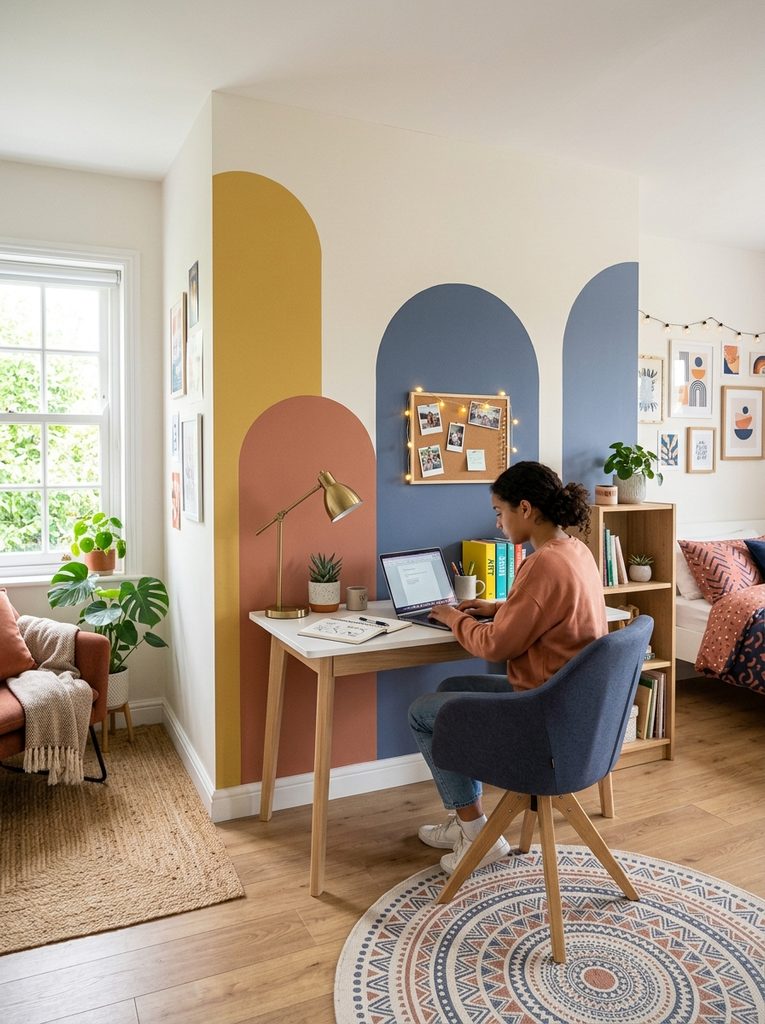
10. Paint a shape on the wall and call it architecture
One tin of paint, one afternoon. The arch behind the bed is my favourite cheap trick.
The cheapest idea on this list, and possibly my favourite. A painted arch behind the bed, a bold rectangle behind the desk, a diagonal slice of colour across a corner — paint used as architecture, zoning the room without a single piece of furniture. Muted terracotta, dusty navy, sage, and mustard all work; I’d avoid anything neon, which dates faster than milk. Sketch it on paper first, then draw it on the wall with pencil — for an arch, a string tied to a pushpin at the centre point gives you a clean curve. Tape the straight edges with good painter’s tape and press the edges down with a putty knife; that one detail is the difference between a crisp line and a fuzzy one. Two coats, and peel the tape off while the second coat is still slightly tacky. Total cost: one tin of paint and a roll of tape.
Where I’d start, and what I’d skip
If the budget is tight, begin with paint and zones, not furniture. The colour-blocked wall and the canopy corner together cost less than a single new chair and change how the whole room feels. Add picture ledges next, then storage you can build — the window bench — before storage you have to buy. Save the loft bed and the slat wall for when you’re sure the room’s layout is settled, because both are annoying to undo. And one mistake I see constantly: buying a complete matching bedroom set in a theme she’s chosen at thirteen. Neutral, decent furniture plus swappable textiles and art will still look right at seventeen. The theme won’t. Spend on the mattress and the chair; everything else can be humble.
Questions I get asked
How much does a teen room redo actually cost?
Anywhere from about fifty euros to well over a thousand, and the honest answer is that the cheap end looks better than people expect. Paint, ledges, cushions, and a canopy transform a room for very little. The big money goes on the bed and desk chair — which is exactly where it should go.
Will she outgrow it in a year?
Not if the bones are neutral. Keep the furniture plain and grown-up, and let the personality live in prints, bedding, and small things that cost little to swap. That’s the whole strategy behind most of these ideas.
How do I keep it tidy once it’s done?
Give everything a visible home — pegboard hooks, bins in cubbies, drawers under the bed — and keep one rule: ten-minute reset, same time each week. Rooms don’t stay tidy through willpower. They stay tidy when putting things away is easier than dropping them.
Is the loft bed safe for a younger teen?
Yes, with conditions: guardrails on all open sides, a frame anchored into studs, and a strict no-jumping rule that you will enforce exactly once before it enforces itself. If she’s a restless sleeper, choose the low platform bed instead — some kids just are, and no design is worth a bad night’s sleep.
What if the room is really tiny?
Go vertical and go light. Pegboard instead of shelves, ledges instead of frames, the window bench instead of a chair, and pale colours on the biggest surfaces. Small rooms fail from floor clutter, not from square metres.
That’s the list. Pick two ideas, not ten — a painted wall and one good corner will do more than a whole catalogue bought in a panic. If you try one, I’d love to hear how it went. And if it’s the canopy corner, save this on Pinterest first, because you will forget which hook you needed. I did. Twice.